
Table of Contents
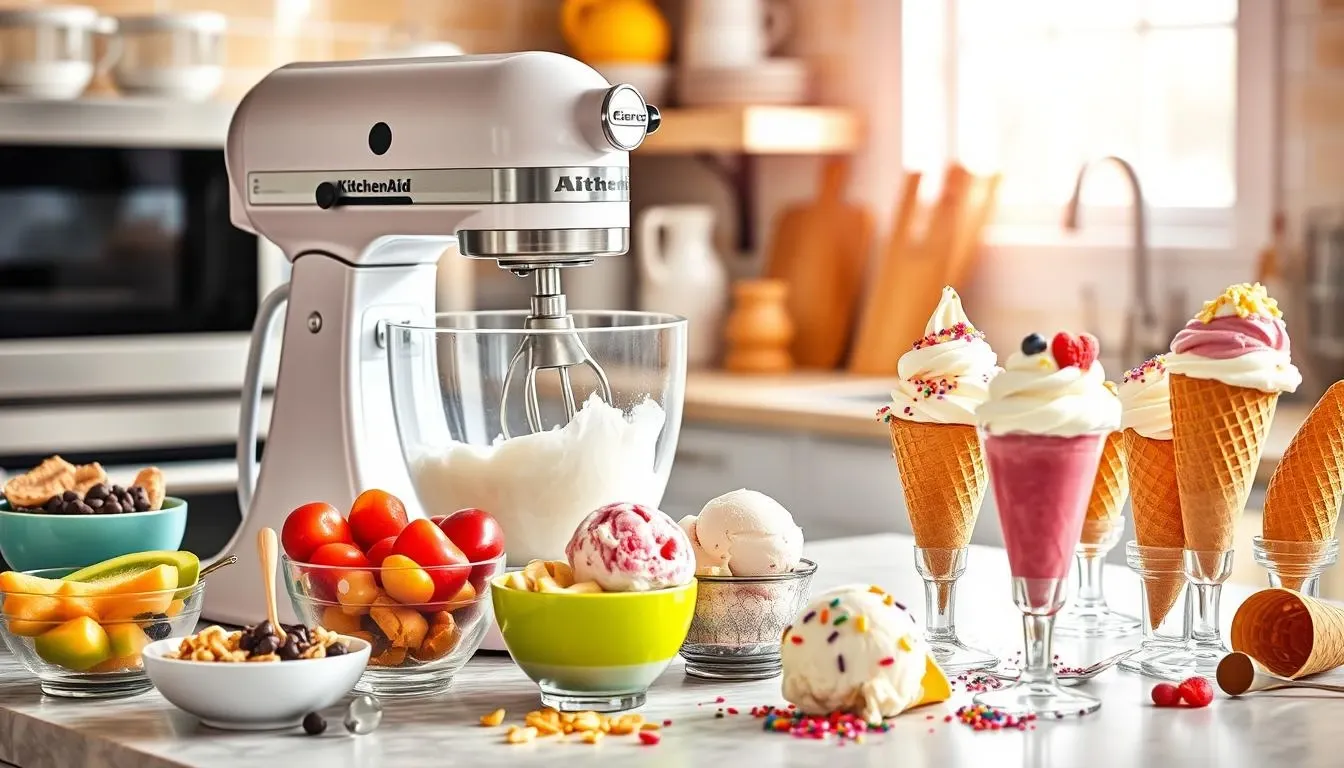
I’m excited to share my passion for making delicious ice cream with my KitchenAid stand mixer. It’s amazing for creating a wide range of flavors, from classic vanilla to unique fruit flavors. This article will guide you through the world of kitchen aid ice cream recipes, helping you improve your ice cream-making skills.
Using a KitchenAid mixer is a fantastic way to start making ice cream at home. With the right techniques and ingredients, you can create creamy and delicious ice cream. The KitchenAid Ice Cream Maker attachment is a worthwhile investment, costing around $70. It can make about 2 quarts of ice cream per batch.
Whether you’re new to ice cream making or already skilled, this article has something for you. We’ll cover everything from the basics of using your Kitchen Aid ice cream maker to advanced techniques for unique flavors. Let’s dive into the world of kitchen aid ice cream recipes and ice cream stand mixer attachment.
Getting Started with Your KitchenAid Ice Cream Maker Attachment
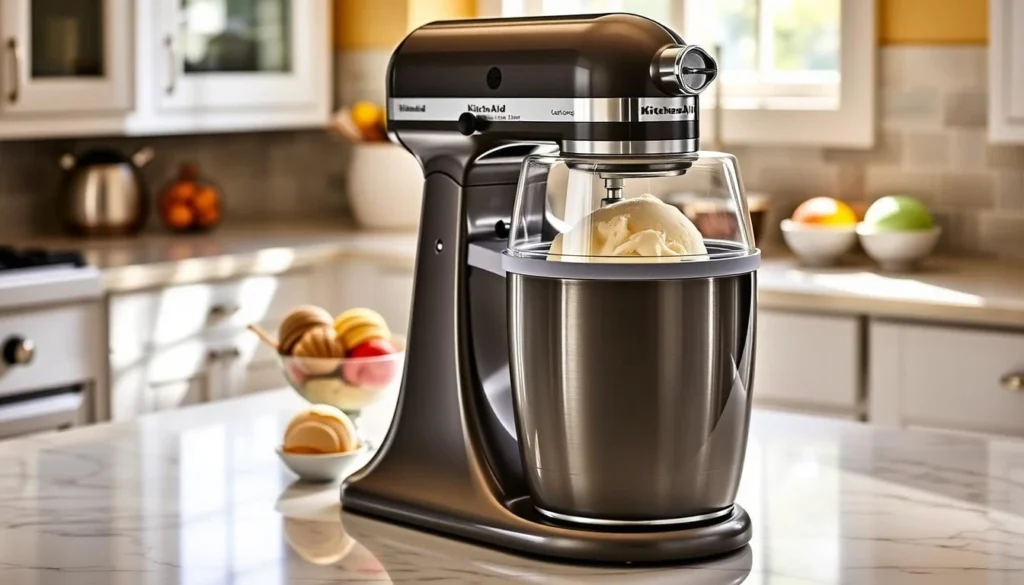
To start making ice cream at home, you need to know the basics of your Kitchen Aid ice cream maker attachment. This tool churns up to 2 quarts of ice cream in under 30 minutes. It’s a great addition to your kitchen. Remember to pre-freeze the bowl for at least 24 hours before use.
The ice cream maker attachment works with all KitchenAid stand mixers, except for a few models. It has three main parts: the freeze bowl, dasher, and drive assembly. You also get an optional freeze bowl adapter for some models. Always store the freeze bowl in the freezer for at least 24 hours before using it. This ensures your ice cream maker attachment churns out smooth and creamy ice cream.
Essential Parts and Assembly
The Kitchen Aid ice cream maker attachment is simple to assemble and use. Its double-walled freeze bowl freezes evenly during mixing. The dasher scrapes the bowl’s sides and adds air, making the ice cream smooth. Just attach the freeze bowl to your KitchenAid stand mixer and add your favorite ingredients.
Pre-Freezing Requirements
Pre-freezing the bowl is key to making ice cream with your Kitchen Aid ice cream maker attachment. It ensures the mixture freezes evenly and quickly, giving you a smooth texture. You can also make different flavors, from vanilla to chocolate and strawberry.
Safety Tips and Best Practices
When using your Kitchen Aid ice cream maker attachment, follow some safety tips and best practices. Always handle it with care and never leave it unattended. Also, follow the manufacturer’s instructions for assembly, use, and cleaning. By doing this, you’ll be able to make delicious and unique ice cream flavors at home.
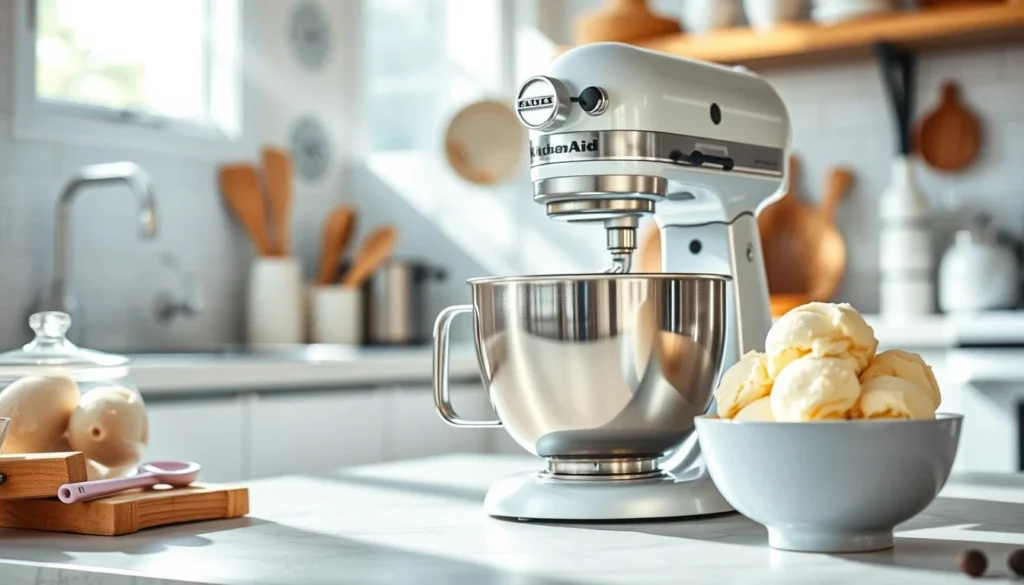
The Basic Ice Cream Base: Your Foundation for Success
To make delicious creamy homemade ice cream, you need a solid base. The basic ice cream base is key. It lets you try many flavors and ingredients. Start with vanilla ice cream KitchenAid for a classic base.
Quality ingredients are crucial for a rich ice cream. Use fresh milk and real vanilla extract. You can also add cocoa powder or melted chocolate for a chocolate ice cream base.
Here are some tips for making the perfect ice cream base:
- Use a mix of heavy cream and whole milk for creaminess
- Add vanilla extract for a classic taste
- Try different flavors to make unique ice creams
Follow these tips and practice, and you’ll soon make tasty ice cream recipes for Kitchenaid. Always choose high-quality ingredients. Don’t be afraid to mix flavors for something new and tasty.
| Ingredient | Quantity |
|---|---|
| Heavy Cream | 1 cup |
| Whole Milk | 1 cup |
| Vanilla Extract | 1 teaspoon |
Essential Kitchen Aid Ice Cream Recipes for Beginners
Starting with simple recipes is key when you’re new to making ice cream. We’ll look at three basic recipes: classic vanilla bean, rich chocolate dream, and fresh strawberry delight. These can all be made with a KitchenAid mixer and ice cream maker attachment.
Using a KitchenAid mixer opens up a world of ice cream possibilities. You can whip up no-churn ice cream recipes like a vanilla ice cream with just a few ingredients. These include heavy cream, whole milk, sugar, and vanilla extract.
Classic Vanilla Bean
This vanilla bean ice cream is perfect for beginners. It needs heavy cream, whole milk, sugar, and vanilla extract. You can make it in under 30 minutes. Serve it right away or freeze it for a creamier texture.
Rich Chocolate Dream
Chocolate fans will love this rich chocolate dream ice cream. It combines heavy cream, whole milk, sugar, and cocoa powder for a creamy chocolate treat. You can make it with a KitchenAid mixer and ice cream maker attachment.
Fresh Strawberry Delight
The fresh strawberry delight ice cream is a sweet treat. It uses heavy cream, whole milk, sugar, and fresh strawberries. This recipe is great for those who want a healthy and tasty ice cream at home.
Understanding Ice Cream Science and Texture
Making delicious ice cream requires knowing the science behind it. To get the right consistency, using a kitchenaid ice cream maker is key. It helps in creating frozen desserts with a stand mixer. The amount of air whipped into the ice cream affects its texture and taste.
For example, using 2 cups of heavy whipping cream and 1 can of condensed milk makes it smooth and creamy. Sea salt lowers the freezing point of the ice cream. Viscosity, or how easily a liquid flows, is also important. Heavy whipping cream flows better than condensed milk.
The mixing process creates millions of tiny bubbles, making the ice cream light. This is where a kitchen aid ice cream maker is useful. It helps in making the perfect frozen desserts.
Some important things to remember when making ice cream include: * The right mix of the ice cream base, with about 60% water, 15% sugar, 10% non-fat milk, and 10-20% milk-fat * Pasteurization and homogenization kill bacteria and improve the ice cream’s stability and air capture * Freezing the ice cream base at the right temperature, between -9°F and -20°F
By understanding these points and using your kitchen aid ice cream maker well, you can make unique flavors. For instance, mint flavored ice cream with 1 package of Oreo cookies. With practice, you’ll solve common problems and create your own recipes, making perfect frozen desserts every time.
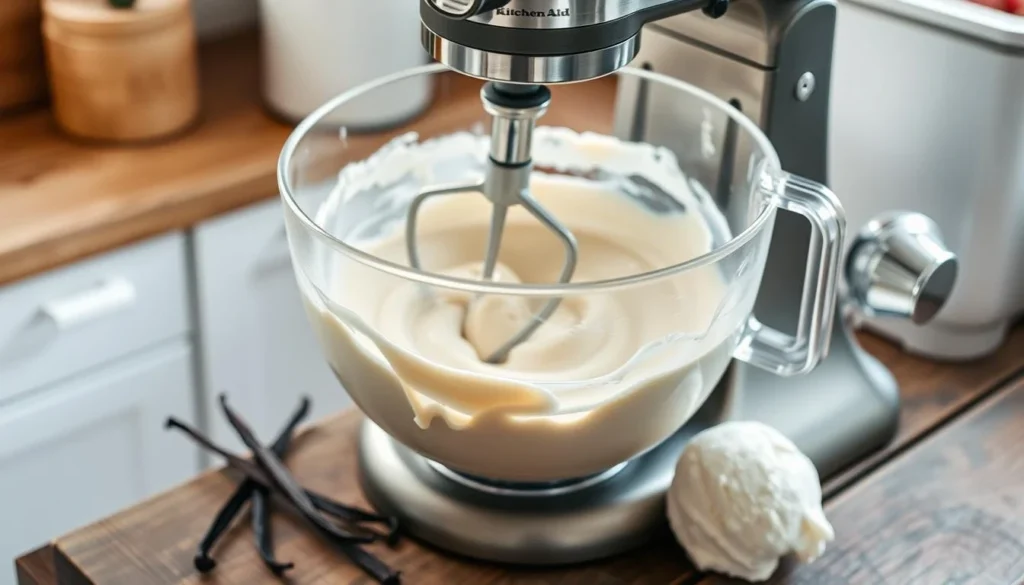
Mastering Custard-Based Ice Creams
To make creamy homemade ice cream, you need to know about custard-based ice creams. These are made with cream, milk, eggs, sugar, and flavorings like vanilla. These ingredients are key in many Kitchen Aid ice cream recipes. The process includes tempering eggs, cooking the custard, and chilling it before churning.
Getting the right consistency is key in making custard-based ice creams. This means cooking the custard to the right temperature and cooling it well. For example, a chocolate ice cream recipe needs a rich and smooth custard base before adding chocolate flavoring.
French Vanilla Technique
The French vanilla technique uses high-quality vanilla beans or extract for a deep flavor. This method is essential for custard-based ice creams and works well with chocolate ice cream too.
Tempering Eggs Successfully
Tempering eggs is a critical step in making custard-based ice creams. It involves slowly adding hot custard to eggs to prevent them from scrambling. This requires patience and attention to detail for a creamy texture.
Achieving Perfect Smoothness
For perfect smoothness in custard-based ice creams, focus on the churning process. A Kitchen Aid ice cream maker attachment can help achieve a smooth texture. The goal is to churn until the ice cream is soft-serve or scoopable.
Creative Mix-Ins and Flavor Combinations
I’m excited to share some unique and delicious ideas for mix-ins and flavor combinations. From classic vanilla and chocolate to matcha and strawberry balsamic, the possibilities are endless. With the Kitchen Aid ice cream maker attachment, I can easily create a variety of flavors to suit any taste.
Fresh fruits, nuts, and candy pieces are my favorite mix-ins. I love adding sliced strawberries or blueberries to my vanilla ice cream for a sweet and refreshing flavor. Chopped nuts like almonds or walnuts add crunch. Sometimes, I add candy pieces like M&M’s or chocolate chips for a colorful and playful flavor.
Flavor combinations are endless. I’ve paired my ice cream with summer dessert recipes like grilled peaches or pineapple upside-down cake. I’ve also tried different spices and extracts, like cinnamon or mint, to create unique flavors. With the Kitchen Aid ice cream maker, I can easily try out new and exciting flavor combinations to find my perfect match.
Here are some ideas for mix-ins and flavor combinations to get you started:
- Fresh fruits like strawberries, blueberries, or raspberries
- Nuts like almonds, walnuts, or pecans
- Candy pieces like M&M’s, chocolate chips, or sprinkles
- Spices like cinnamon, nutmeg, or cardamom
- Extracts like vanilla, almond, or coconut
With these ideas and the ice cream maker attachment, you’ll be well on your way to creating unique and delicious flavors. Don’t be afraid to get creative and try out new mix-ins and flavor combinations. You never know what amazing flavor you might discover!
| Flavor Combination | Mix-ins | Description |
|---|---|---|
| Strawberry Cheesecake | Fresh strawberries, graham cracker crumbs | A sweet and tangy flavor with a crunchy texture |
| Mint Chocolate Chip | Peppermint extract, chocolate chips | A refreshing and cooling flavor with a chocolatey twist |
| Peach Cobbler | Grilled peaches, cinnamon | A warm and spicy flavor with a sweet and juicy texture |
Dairy-Free and Vegan Options for Your KitchenAid
If you use a KitchenAid, you might be eager to try dairy-free and vegan ice cream. Plant-based diets are becoming more popular, making it easy to make tasty, creamy treats. We’ll explore coconut milk, nut milks, and natural sweeteners to enhance your ice cream.
No-churn ice cream recipes are a fantastic starting point for dairy-free ice cream. They often use full-fat canned coconut milk for a creamy texture. You can also try nut milks like almond or cashew, but they might be less creamy. For a classic vanilla ice cream recipe KitchenAid fans love, mix coconut milk with maple syrup and a bit of vanilla.
Some top ingredients for vegan ice cream include:
- Full-fat coconut milk
- Toasted shredded coconut
- Pitted dates or soaked cashews
- Additional fruits like mango or berries
These ingredients can be mixed in many ways to make unique and tasty flavors. With adairy-free ice cream recipe, you can enjoy creamy ice cream without dairy.
By trying different ingredients and flavors, you can make a variety of dairy-free and vegan ice creams. Whether you want a classic vanilla or something new, your Kitchen Aid ice cream maker can help.
Seasonal Favorites and Holiday Specials
As the holiday season comes, I enjoy making special ice cream flavors. My Kitchen Aid ice cream maker makes it easy to create creamy homemade ice cream like peppermint and gingerbread. These flavors are a big hit with my loved ones.
One of my top ice cream recipes for kitchenaid is Little Debbie Christmas Tree Cakes ice cream. It mixes vanilla and chocolate with Christmas tree cakes. This summer dessert recipe is great for hot days and uses fresh ingredients like strawberries and heavy cream.
Here are some tips for holiday ice cream flavors:
- Use high-quality and fresh ingredients, such as real vanilla extract and heavy cream.
- Try different flavor mixes, like peppermint and chocolate or gingerbread and caramel.
- Add mix-ins, like crushed candy canes or chopped nuts, for a festive touch.
With these tips and a bit of creativity, you can make your own special ice cream recipes for kitchenaid for the holidays. So, why not start making some creamy homemade ice cream today? Your friends and family will love it!
No-Churn Recipes Using Your KitchenAid Stand Mixer
Many think you need an ice cream maker to make ice cream. But, a KitchenAid stand mixer can do the trick. It’s perfect for those who love ice cream but don’t want to churn it.
No-churn ice cream recipes are quick and easy. You can whip up a batch in no time with just a few ingredients. For instance, you can make vanilla ice cream recipe kitchenaid style without an ice cream maker.
Whipped Cream Method
This method whips heavy cream until stiff, then mixes it with sweetened condensed milk and flavorings. It’s simple and efficient, making creamy and delicious ice cream. You can also add cocoa powder or mashed strawberries for unique flavors.
Quick Freeze Techniques
Quick freeze techniques are another way to make no-churn ice cream. Mix the ingredients, then freeze until set. You can use Greek yogurt or coconut milk for a creamy texture. For example, a no-churn ice cream recipe with Greek yogurt, honey, and vanilla is a hit.
Here are some tips for making no-churn ice cream: * Use top-quality ingredients like heavy cream and real vanilla. * Try different flavorings like cocoa powder or nuts. * Freeze for at least 2 hours to set. * Serve right away or store in an airtight container for up to 2 weeks.
| Recipe | Ingredients | Prep Time | Freeze Time |
|---|---|---|---|
| Vanilla Ice Cream | Heavy cream, sweetened condensed milk, vanilla extract | 10 minutes | 2 hours |
| Chocolate Ice Cream | Heavy cream, sweetened condensed milk, cocoa powder | 10 minutes | 2 hours |
| Strawberry Ice Cream | Heavy cream, sweetened condensed milk, mashed strawberries | 10 minutes | 2 hours |
Troubleshooting Common Ice Cream Making Challenges
Using a KitchenAid ice cream maker can sometimes lead to problems. One common issue is an icy texture. This happens when large ice crystals form in the mixture. To solve this, it’s important to follow frozen dessert recipes carefully and use the right techniques.
Here are some tips for making ice cream at home with a Kitchen Aid ice cream maker:
- Ensure the bowl is pre-frozen for at least 12 hours to achieve the best results.
- Use the correct ratio of ingredients to avoid unbalanced recipes that can lead to icy ice cream.
- Avoid over-churning, as this can introduce air into the mixture and cause ice crystals to form.
By following these tips for making ice cream at home and understanding how to use a Kitchen Aid ice cream maker, you can create delicious and creamy frozen desserts. Always follow the manufacturer’s instructions and take the time to properly prepare your ingredients and equipment.
Advanced Techniques for Artisanal Flavors
To elevate your ice cream game, it’s time to dive into advanced techniques. With your Kitchen Aid ice cream maker, you can make creamy homemade ice cream that’s as good as store-bought. Try adding mixtures like cocoa powder or fruit puree to your ice cream base for ripples and swirls.
Another cool technique is adding alcohol-based flavors to your ice cream. This adds a rich taste and a bit of class to your creations. When using alcohol, pick the right type and amount to keep your ice cream smooth. For instance, a chocolate ice cream kitchenaid recipe can get a boost from Kahlua or Baileys.
Creating your own extracts is also worth exploring. Making unique extracts like vanilla, almond, or coffee can make your ice cream stand out. With these techniques, you can craft ice cream recipes for kitchenaid that wow everyone.
- Start with small batches to ensure the flavors and textures are balanced
- Experiment with different combinations of ingredients to find your perfect flavor
- Don’t be afraid to try new and unusual ingredients to create unique flavors
Storage Tips and Serving Suggestions
After making your tasty ice cream with a Kitchen aid ice cream maker, it’s key to store it right. This keeps its texture and taste just right. Store it in a sealed container in the freezer. You can also use the ice cream maker attachment for easy scooping and serving.
For easy dessert ideas with stand mixer, think about making ice cream in small portions. Use ramekins or small containers. This makes serving your homemade ice cream a breeze. Here are some tips and ideas for storing and serving your ice cream:
- Store ice cream in an airtight container to prevent freezer burn and maintain flavor.
- Use a Kitchen Aid ice cream maker to scoop and serve your ice cream for a perfect scoop every time.
- Consider making a batch of ice cream and storing it in individual portions for easy serving.
By following these tips and ideas, you can enjoy your homemade ice cream at its best. Always use your ice cream maker attachment for scooping. And, making a batch of ice cream with easy dessert ideas with stand mixer is a quick and tasty way to treat yourself.
| Storage Tips | Serving Suggestions |
|---|---|
| Scoop and serve with KitchenAid ice cream maker | Scoop and serve with kitchenaid ice cream maker |
| Use individual portions | Make a batch of ice cream for easy serving |
Creating Your Own Signature Recipes
Exploring ice cream making is thrilling, and creating unique flavors is the best part. With a KitchenAid ice cream maker, the options are limitless. I start by learning the basics of ice cream recipes for KitchenAid, aiming for creamy homemade ice cream ideal for summer.
I think about the flavor I want to create. Do I prefer something classic or something new and exciting? Maybe I’ll mix different fruits or add a spice for a unique taste. The goal is to mix flavors and textures for a signature recipe.
Flavor Balancing Guide
To make my ice cream tasty and pretty, I follow some key steps. First, I balance the sweetness to avoid it being too sweet. Then, I aim for a smooth, creamy texture. Lastly, I add mix-ins or toppings to boost the flavor and look. This way, I can make ice cream recipes for KitchenAid that are both unique and tasty.
Texture Enhancement Methods
Texture is just as important as flavor in ice cream. I play with churning times and temperatures to improve it. I also add ingredients like nuts, candy, or cookies for fun textures. By using these methods with my flavor guide, I make creamy homemade ice cream perfect for summer.
Health-Conscious Ice Cream Alternatives
Exploring ice cream options means looking at healthy choices for different diets. Dairy-free ice cream is great for those with lactose intolerance or who prefer plant-based foods. No-churn ice cream recipes are also popular because they don’t need an ice cream maker and use better ingredients.
Adapting a vanilla ice cream recipe kitchenaid for dairy-free is easy. Just swap regular milk for almond or coconut milk. This change not only meets dietary needs but also adds a special taste. For example, coconut milk in a no-churn ice cream recipe makes a creamy and indulgent dessert.
Some healthy ice cream options include:
- Frozen fruit-based desserts, which are low in calories and full of vitamins and antioxidants
- Dairy-free ice cream made with coconut milk or almond milk, offering a creamy texture without dairy
- No-churn ice cream recipes that use healthier ingredients and don’t need an ice cream maker
By trying these healthy ice cream alternatives, you can enjoy your favorite treats while keeping your diet balanced. Whether you like dairy-free ice cream or no-churn ice cream recipes, there are many tasty and healthy choices out there.
Conclusion: Your Journey to Ice Cream Mastery
As we finish our look at ice cream recipe with kitchenaid mixer, I hope you’re ready to keep making amazing ice cream at home. You now know how to make many flavors and textures with your ice cream stand mixer attachment.
Great kitchen aid ice cream maker results come from knowing the basics, trying new flavors, and understanding ice cream science. Whether it’s a classic vanilla or a unique mix, you can do it all. Be creative, enjoy the process, and don’t hesitate to try new recipes.
Keep improving your ice cream skills and share your creations with loved ones. Seeing their joy when they taste your ice cream is the best reward. Happy churning, and may your ice cream adventures be as smooth and creamy as the final scoops you serve.
FAQ
What are the essential parts and assembly of the Kitchen Aid ice cream maker attachment?
The main parts are the freezer bowl, dasher, and drive assembly. Assembling them correctly ensures safe and efficient use.
How do I properly pre-freeze the Kitchen Aid ice cream maker attachment?
Place the freezer bowl in the freezer for at least 15 hours before use. This makes it ready for ice cream making.
What are some important safety tips for using the Kitchen Aid ice cream maker attachment?
Always keep your hands and fingers away from moving parts. Unplug the mixer when not in use. Follow the manufacturer’s instructions carefully.
What is the basic ice cream base recipe and why is it important?
The basic base includes cream, milk, sugar, and egg yolks. It’s the foundation for creamy and smooth ice cream.
What are some essential Kitchen Aid ice cream recipes for beginners?
Start with classic vanilla bean, rich chocolate dream, and fresh strawberry delight. They’re great for beginners.
How do I master custard-based ice creams with my KitchenAid?
Use the French vanilla method and egg tempering. These techniques help achieve a smooth custard-based ice cream texture.
What are some creative mix-in and flavor combination ideas for Kitchen Aid ice cream?
Try classic vanilla and chocolate or adventurous flavors like matcha and strawberry balsamic. The possibilities are endless.
Can I make dairy-free and vegan ice cream with my KitchenAid?
Yes, you can make delicious dairy-free and vegan ice cream. Use coconut milk, nut milks, and natural sweeteners.
How can I make no-churn ice cream recipes using my KitchenAid stand mixer?
Use the whipped cream method and quick freeze techniques. They help create creamy ice cream without an ice cream maker.
What are some advanced techniques for creating artisanal ice cream flavors with my KitchenAid?
Try creating ripples and swirls, incorporating alcohol-based flavors, and making custom extracts. These techniques can elevate your ice cream making.