
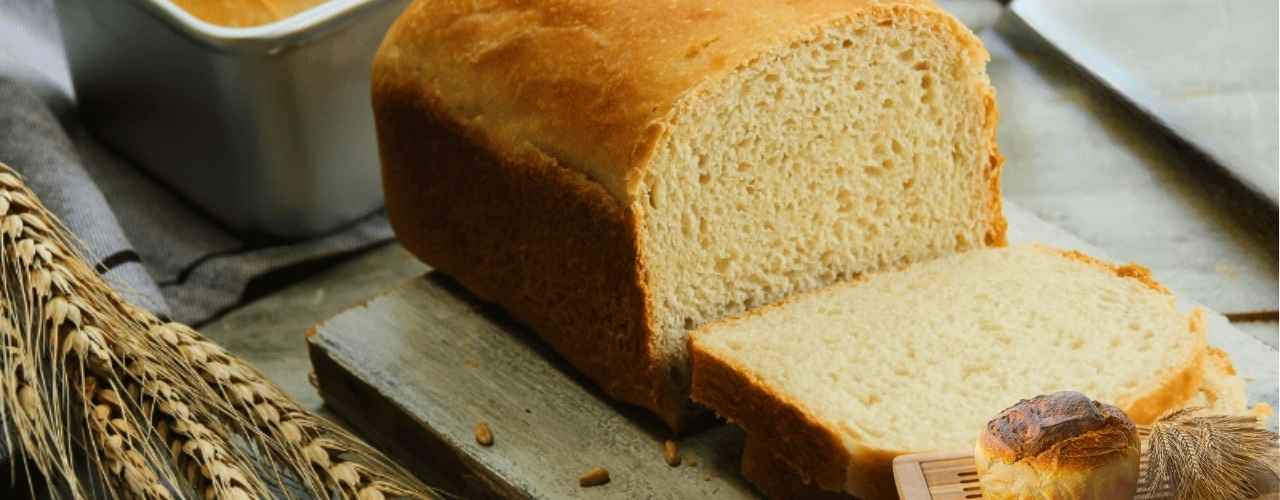
Starting your sourdough sandwich bread journey? You might wonder how to make bread as good as your favorite bakery’s. This guide will cover everything from sourdough’s benefits to mastering the baking process. It’s perfect for both newbies and seasoned bakers, aiming to help you make delicious sourdough at home.
This guide focuses on a step-by-step approach to making the perfect sourdough sandwich bread. You’ll learn how to make bread that’s not just tasty but also healthy. You’ll understand sourdough, its benefits, and how to mix, proof, and bake it. This way, you’ll create sourdough sandwich loaves that will wow your loved ones.
Table of Contents
Understanding Sourdough: The Living Bread
Starting your sourdough sandwich bread journey is exciting. It’s key to know how sourdough works. This bread uses a natural starter instead of commercial yeast. To make great sourdough, you need to learn about sourdough starters.
Creating sourdough starts with a starter. This starter is a mix of wild yeast and bacteria. It makes the bread tasty and full of nutrients. Using a natural starter makes the bread easier to digest and more flavorful than yeast-made bread.
Choosing sourdough over commercial yeast has many benefits. These include:
- Higher nutrient content
- Easier digestibility
- Unique and complex flavor profile
By following the right sourdough starter tips, you can make a healthy and tasty bread. It’s perfect for sandwiches and more.
The Science Behind Sourdough Fermentation
The science of sourdough fermentation is both fascinating and complex. The yeast and bacteria in the starter break down sugars. This process makes lactic acid and gives sourdough its sour taste.
Essential Equipment for Baking Sourdough Sandwich Bread
To bake sourdough bread at home, you need the right tools. You’ll need a large mixing bowl, a measuring cup, a wooden spoon, and a baking stone. These tools help you get the best results.
A baking stone is key for a crispy crust. You also need a steam injector or a Dutch oven for the bread to rise right. Here’s what you’ll need:
- Mixing bowls
- Measuring cups
- Wooden spoon
- Baking stone
- Steam injector or Dutch oven
Good equipment makes baking sourdough bread fun and easy. Investing in quality tools will help you get the best results.
With the right tools, you’re ready to make delicious sourdough sandwich bread. Always use fresh ingredients and a tested recipe for the best results.
| Equipment | Description |
|---|---|
| Mixing bowls | Large, sturdy bowls for mixing dough |
| Measuring cups | Accurate measuring cups for ingredients |
| Wooden spoon | A sturdy spoon for mixing and handling dough |
| Baking stone | A preheated stone for baking bread |
| Steam injector or Dutch oven | A device for creating steam and promoting bread rise |
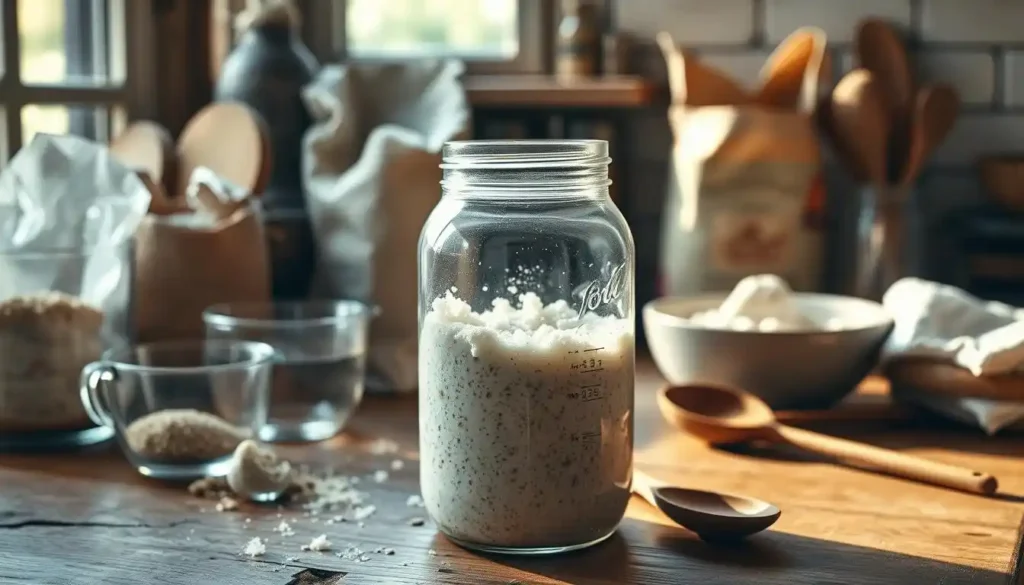
Creating and Maintaining Your Sourdough Starter
To make a soft sourdough sandwich loaf, you need a healthy starter. Your starter is key to making bread. With the right tips, you can keep your starter thriving.
Starting from scratch takes patience and effort. Mix flour and water to create your starter. With regular care, it will become lively and bubbly. A good starter is crucial for a tasty loaf.
Building Your Starter from Scratch
To start, mix equal parts flour and water in a clean container. Cover it and keep it warm and still. After 24-48 hours, toss half and add fresh flour and water. Do this every 24 hours to grow a healthy starter.
Feeding Schedule and Maintenance
When your starter is active, feed it daily. Use a 1:1:1 ratio of starter, flour, and water. You can also store it in the fridge to slow it down. Before baking, feed it and let it warm up.
| Feeding Schedule | Starter:Flour:Water Ratio |
|---|---|
| Daily Feeding | 1:1:1 |
| Before Bread Making | 1:1:1 |
By following these tips and keeping your starter healthy, you’ll make a delicious loaf. It will wow your family and friends.
Key Ingredients for the Perfect Sourdough Sandwich
To make an amazing artisan sandwich bread, focus on top-notch ingredients. The flour, water, salt, and extra ingredients you pick greatly affect taste and texture. Aim for a mix that balances flavors and textures perfectly.
Some important ingredients to think about include:
- High-protein flour for a chewier texture and stronger gluten
- Filtered water to keep flavors clean
- Unrefined salt for a richer taste
- Optional nuts, seeds, or dried fruits for extra texture and flavor
Choosing the right ingredients and mixing them well can lead to a tasty
Creating a standout artisan sandwich bread is all about trying different mixes. With practice and patience, you’ll make a bread that wows everyone.
Understanding Flour Types and Their Impact
Choosing the right flour is key to making great sourdough bread. To make healthy sandwich bread, knowing your flour options is important. You can experiment with different flours and techniques to learn how to make sourdough bread.
When picking flour, think about protein content and gluten development. Protein content affects your bread’s texture and structure. For instance, bread flour’s higher protein makes it chewier than all-purpose flour.
Bread Flour vs. All-Purpose Flour
Bread flour and all-purpose flour are common choices for sourdough. Bread flour, with 12-14% protein, is great for chewy bread. All-purpose flour, with 10-12% protein, is better for pastries and cakes.
Whole Wheat and Alternative Flours
Whole wheat and alternative flours like rye or spelt add unique flavors and textures. They have a coarser texture and a nuttier taste. Adjusting hydration and proofing times is key when using these flours.
Protein Content and Gluten Development
Knowing your flour’s protein content and gluten development is crucial. Gluten development creates the chewy texture and rise of bread. By controlling these, you can make a delicious and healthy sourdough bread.
The Art of Dough Hydration
To master dough hydration, you must grasp the role of water in step-by-step sourdough bread guide. The right water amount changes your bread’s texture and crumb. It makes the bread tender and crispy. Remember, the humidity and temperature where you are affect the dough’s hydration.
Start with less water and add more as needed. This method helps you get the dough just right. It’s key for a step-by-step sourdough bread guide. Here are some tips to adjust the water:
- Check the dough’s consistency with a stretch test.
- Adjust water based on your environment’s humidity and temperature.
- Use a digital scale for accurate ingredient measurements.
By following these tips, you’ll make a delicious sourdough sandwich bread. It will have a tender crumb and a crispy crust, perfect for your step-by-step sourdough bread guide.
Mastering the Mixing Process
Mixing sourdough bread at home is key to getting the right texture. As a beginner, knowing how to mix is crucial. Start with the autolyse method, mixing flour and water to make a smooth dough.
Autolyse Method
The autolyse method mixes flour and water in a special ratio. This makes the dough easy to work with. It also develops the gluten, giving the bread a complex flavor and texture.
Incorporating the Starter
After autolyse, add the sourdough starter. The starter brings a natural yeast culture, fermenting sugars and adding sourness. Mix it in gently to avoid over-working the dough.
Proper Kneading Techniques
Proper kneading is vital for a smooth texture. Use a gentle, folding motion to avoid over-working. With practice, you’ll get the hang of it and make delicious sourdough bread.
Follow these tips to master mixing and make great sourdough bread at home. Use the right flour to water ratio, add the starter gently, and knead with care. With time and effort, you’ll be baking like a pro.
| Technique | Description |
|---|---|
| Autolyse Method | Mixing flour and water to create a smooth, consistent dough |
| Incorporating the Starter | Adding a natural yeast culture to the dough to ferment the sugars |
| Proper Kneading Techniques | Using a gentle, folding motion to develop the gluten and create a smooth texture |
Bulk Fermentation and Folding Techniques
Making natural yeast bread involves a key step: bulk fermentation. This phase lets the dough develop its taste and texture. It can take hours, during which the dough rises for the first time. Keep an eye on the dough’s size and feel to track the fermentation.
Working on artisan sandwich bread means folding the dough to improve its structure. Folding is crucial for spreading yeast evenly and making the bread soft. Here are some tips for folding your dough:
- Fold the dough gently to avoid over-working it
- Use a gentle, stretching motion to fold the dough
- Fold the dough at regular intervals to maintain its structure
Mastering bulk fermentation and folding will help you make tasty natural yeast bread and artisan sandwich bread. These breads will have rich flavors and soft textures. Be patient and let the dough ferment for the right amount of time for the best results.
| Step | Action | Time |
|---|---|---|
| 1 | Mix the dough | 10 minutes |
| 2 | Bulk fermentation | 4-6 hours |
| 3 | Fold the dough | every 30 minutes |
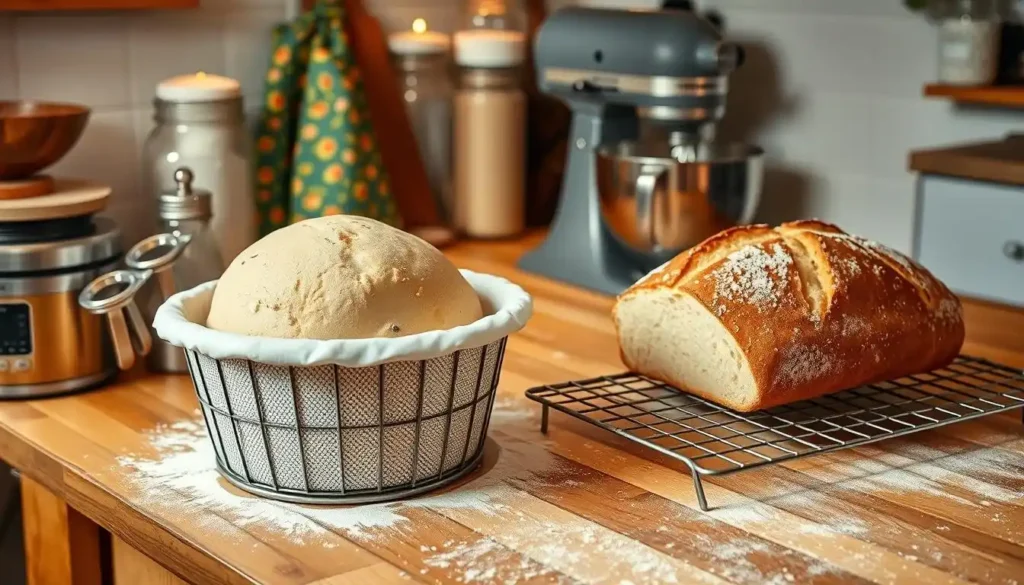
Shaping Your Sourdough Sandwich Loaf
To make a beautiful soft sourdough sandwich loaf, you need to shape it carefully. Shaping is an art that takes patience and practice. You aim for a loaf that keeps its shape during proofing and baking, with a smooth crust.
When shaping your sourdough sandwich loaf, handle the dough gently. This avoids overworking the gluten. It helps you get a tender crumb and a soft texture, ideal for healthy sandwich bread.
Creating Surface Tension
Surface tension is key for a well-shaped loaf. To achieve it, gently stretch and fold the dough. Use a smooth, sweeping motion. This develops the gluten and makes the surface even.
Pan Selection and Preparation
Choose a pan that fits your loaf perfectly. Lightly grease it with oil or butter. This makes the loaf easy to remove after baking and adds a golden-brown crust. With these tips, you’ll shape your sourdough sandwich loaf perfectly. Enjoy delicious, healthy sandwich bread recipes.
The Final Proof: Timing and Temperature
As you near the end of your step-by-step sourdough bread guide, the final proof is key. It’s the last rise before baking. You need to watch timing and temperature closely for a perfectly risen loaf.
To master the final proof, keep a close eye on the dough. Here are some tips to help you:
- Check the dough regularly to ensure it’s rising at the right rate.
- Adjust the proofing time based on environmental factors, such as temperature and humidity.
- Use a thermometer to ensure the dough is at the optimal temperature for proofing.
By following these tips and paying close attention to your dough, you’ll get a beautiful, golden crust. Remember, practice makes perfect. Don’t get discouraged if it takes a few attempts to get it right.
Scoring and Steam: Creating the Perfect Crust
As you near the end of making bread, it’s time for the final touches. Scoring and steaming are key to a crispy, golden crust. These techniques will make your sourdough bread perfect for sandwiches or toast.
The details are what make a great crust. Scoring patterns and steam generation methods are crucial. They can change how your bread looks and feels. Here are some scoring patterns to try:
Scoring Patterns for Sandwich Bread
- Simple cross: A classic pattern that works well for most bread types
- Diagonal cuts: Adds a touch of elegance to your loaf
- Parallel lines: Creates a beautiful, uniform texture
Steam Generation Methods
Steam is key for a crispy crust. You can use a steam injector or a dutch oven. Or, place a pan of water in the oven for steam.
Follow these tips to get a perfect crust. Remember, practice makes perfect. Don’t get discouraged if it takes a few tries. With patience and persistence, you’ll be baking like a pro soon.
| Scoring Pattern | Steam Generation Method | Result |
|---|---|---|
| Simple cross | Steam injector | Crispy, golden crust |
| Diagonal cuts | Dutch oven | Beautiful, elegant loaf |
| Parallel lines | Pan of water | Uniform, crunchy crust |
Baking Temperature and Timing Guidelines
Baking sourdough bread right is key. You want a crispy crust and a soft inside. To get this, you need to know how to adjust the oven temperature and baking time.
Learning to bake sourdough is all about trying different temperatures and times. This helps you find what works best for you.
Natural yeast bread baking needs patience and careful attention. Here are some basic tips to follow:
- Preheat your oven to the right temperature (usually 450-500°F) before baking.
- Use a Dutch oven or a stone to help the crust develop.
- Bake the bread for 25-40 minutes, depending on the loaf size and oven temperature.
By following these tips and practicing, you can make delicious sourdough bread. It will have a unique taste and texture. Always watch your bread while it’s baking. The temperature and time may change based on your oven and loaf size. With time, you’ll get better at baking natural yeast bread and make the perfect loaf.
Cooling and Storage Methods
After baking sourdough bread at home, it’s key to cool and store it right. This keeps it fresh and tasty. It’s crucial for healthy sandwich bread recipes, as the bread’s texture and flavor matter a lot.
To cool your sourdough bread, place it on a wire rack or a clean towel. This lets air circulate, preventing sogginess and ensuring even cooling.
Proper Cooling Techniques
- Let the bread cool completely before storing it
- Use a wire rack or clean towel to promote air circulation
- Avoid cooling the bread in a sealed container or plastic bag
Storage Solutions for Maximum Freshness
To keep your sourdough bread fresh, store it in a paper bag or a bread box. You can also freeze it for up to 2 months and thaw it when you need it.
By using these cooling and storage tips, you can enjoy your homemade sourdough sandwich bread for days. Its flavor and texture will stay great.
| Storage Method | Shelf Life |
|---|---|
| Room temperature | 2-3 days |
| Refrigerator | 5-7 days |
| Freezer | 2 months |
Troubleshooting Common Sourdough Issues
Starting to make sourdough bread can be fun but also tricky. You might face some common problems that can mess up your bread’s quality. But don’t worry, with the right steps, you can fix these issues and make great bread every time.
Some common problems include bread that’s too dense or gummy, starter issues, and crust problems. Here are some ways to tackle these issues:
Dense or Gummy Texture Solutions
- Make sure your dough’s water level is just right, not too much or too little.
- Work on your dough mixing and kneading to get the gluten right.
- Keep an eye on your dough’s fermentation temperature and time to hit the sweet spot.
Addressing Starter Problems
A healthy starter is key to making excellent sourdough bread. If your starter is acting up, try feeding it more often or changing its environment to help it grow better.
Fixing Crust Issues
A great crust is essential for your artisan sandwich bread. To improve your crust, tweak your scoring method or switch to a flour that makes a better crust.
By using these troubleshooting tips, you can solve common problems and make delicious sourdough bread. Your bread will be as good as any artisan sandwich bread.
Creative Variations for Your Sourdough Sandwich Bread
Now that you know how to make sourdough sandwich bread, it’s time to get creative. You can mix and match different flavors and ingredients. This lets you make your bread just the way you like it.
To make a soft sourdough sandwich loaf, try adding nuts, seeds, herbs, or spices to the dough. Here are some ideas:
- Garlic and rosemary: Add garlic and rosemary for a savory taste.
- Cranberry and orange: Mix in dried cranberries and orange zest for a sweet and tangy bread.
- Walnut and honey: Combine walnuts and honey for a rich and sweet bread.
When you try new ingredients, adjust the recipe to get the best results. You can also play with different shapes to make your bread look great. With practice, you can make many delicious sourdough sandwich breads that will wow everyone.
Don’t be afraid to experiment and try new things – it’s all part of the fun of baking sourdough bread. With a little creativity, you can create a truly unique and delicious soft sourdough sandwich loaf that reflects your personality and style.
Conclusion: Your Journey to Sourdough Mastery
As you finish this guide, your sourdough journey is just starting. You now have the basics to start baking sourdough at home. Dive into the world of sourdough bread making and try new things.
Every loaf you make shows your skills and creativity. Be proud of your delicious sourdough bread. Share it with loved ones and enjoy the process.
The path to sourdough mastery is rewarding, with ups and downs. Enjoy every moment, learn from your mistakes, and become a sourdough expert. Your homemade sourdough sandwiches will bring joy and nourishment to all who taste them.
FAQ
What is the science behind sourdough fermentation?
Sourdough fermentation uses natural yeast and bacteria from the starter. These microorganisms eat the dough’s sugars. They make lactic and acetic acids, giving sourdough its unique taste and better nutrition.
Why should I choose sourdough over commercial yeast?
Sourdough bread tastes more complex and lasts longer than yeast-made bread. It’s also easier to digest because of the fermentation process. This process breaks down gluten and makes nutrients more available.
What are the health benefits of sourdough bread?
Sourdough is healthier than bread made with commercial yeast. It has a lower glycemic index and more fiber and nutrients. It’s also better for those with gluten sensitivity or intolerance.
What essential equipment do I need for baking sourdough sandwich bread at home?
You’ll need a mixing bowl, measuring cups and spoons, and a bench scraper. A bread lame or sharp knife, a baking stone or Dutch oven, and a spray bottle for steam are also necessary.
How do I create and maintain a healthy sourdough starter?
Start by mixing flour and water and feed it regularly. This lets natural yeast and bacteria grow. Keep it healthy by feeding it often and watching for signs of growth.
What types of flour are best for making sourdough sandwich bread?
Use bread flour for its high protein content. It helps develop gluten. Adding small amounts of whole wheat or other flours can add flavor and nutrition.
How do I achieve the perfect dough hydration for sourdough sandwich bread?
Hydration affects the bread’s texture and crumb. Aim for 70-80% hydration. Adjust based on flour type and environment.
What are the proper mixing and kneading techniques for sourdough dough?
Use the autolyse method to rest flour and water before adding starter. Kneading, by hand or with a mixer, builds gluten structure.
How do I shape a sourdough sandwich loaf?
Shape the dough into a tight ball for surface tension. This helps the loaf keep its shape. Grease or line the pan to help the loaf maintain its structure.
How do I know when my sourdough dough is ready for the final proof?
The dough is ready when it doubles in size and passes the “poke test.” A finger pressed lightly should leave a slight indentation that fills back in.
What’s the best way to score and steam my sourdough sandwich bread?
Score the dough with a sharp blade for patterns and expansion. Steam the oven with a spray bottle or a hot metal pan for a crisp crust.
How do I properly cool and store my sourdough sandwich bread?
Cool the loaf completely on a wire rack before slicing and storing. Store in a paper or cloth bag at room temperature for freshness. Avoid plastic, which can soften the crust.
How can I troubleshoot common sourdough issues, such as a dense or gummy texture?
For dense or gummy texture, adjust hydration, proofing times, or oven temperature and steaming. Monitor your dough’s development and make small adjustments to solve problems.
What are some creative variations I can try for my sourdough sandwich bread?
Try adding nuts, seeds, herbs, or spices to your sourdough. Experiment with different shapes or whole grains for unique flavors and textures.