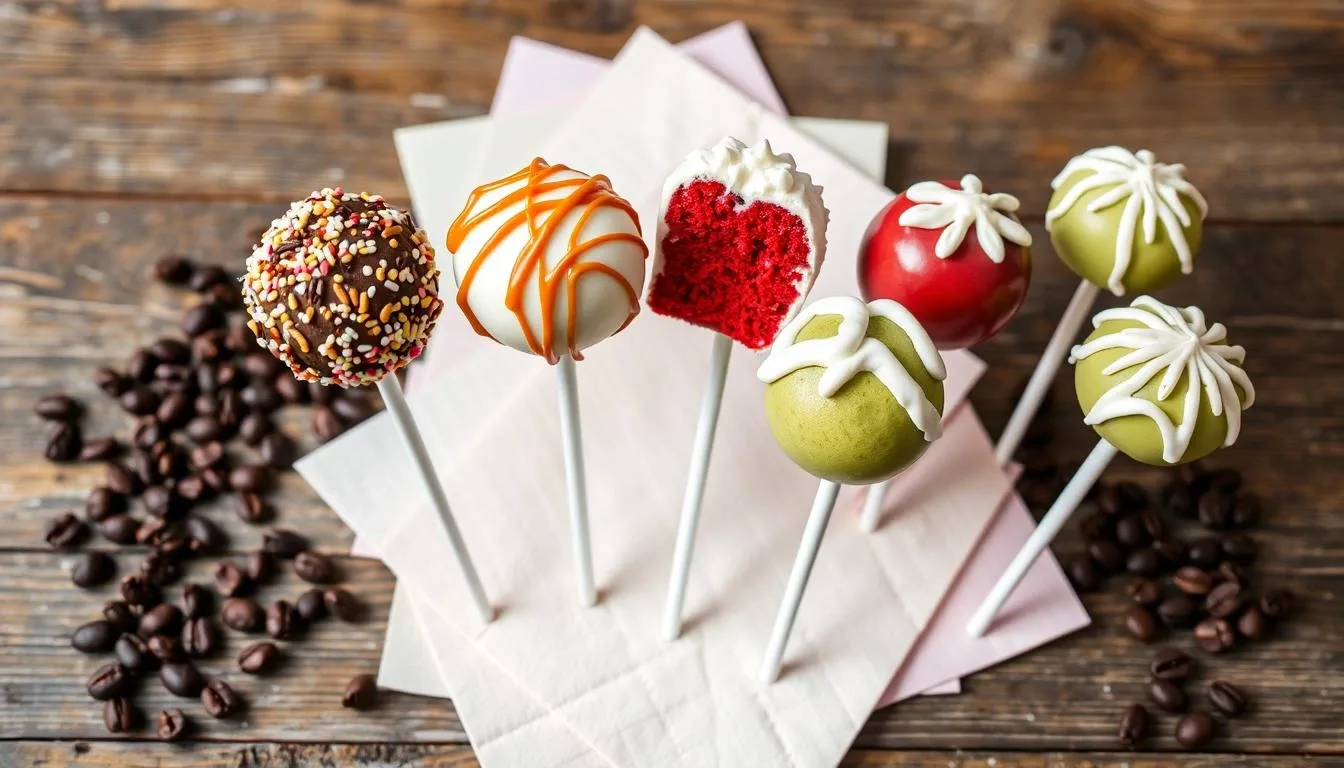
The first time I tried a Starbucks cake pop, it was like a burst of sweetness. It brought back memories of my childhood. Those round, decorated treats seemed like magic, only found in professional kitchens. But, you can make these treats at home too.
This recipe is more than just a guide. It’s your chance to make those beloved treats your own. Whether you’re new to baking or experienced, making these cake pops is simple. With a few ingredients and patience, you’ll create homemade cake pops that wow everyone.
Table of Contents
Understanding the Magic Behind Starbucks Cake Pops
Cake pops have become a big hit in the dessert world. Starbucks-inspired cake pops are at the top, offering creative and tasty treats. These small treats have won the hearts of many dessert fans in the United States. They have changed how people enjoy sweet snacks.
The Sweet Origin Story
The story of Starbucks cake pops started as a way to use up leftover cake. Bakers turned cake crumbs into tasty treats. Soon, copycat Starbucks cake pops became a hit, moving from coffee shops to home kitchens all over.
What Sets Them Apart
- Perfectly portioned bite-sized treats
- Intricate decorative designs
- Rich, moist cake interior
- Smooth chocolate or candy coating
Popular Flavors and Varieties
| Flavor | Description | Popularity Rating |
|---|---|---|
| Birthday Cake | Vanilla cake with sprinkles | ★★★★★ |
| Chocolate | Rich chocolate cake with dark coating | ★★★★☆ |
| Strawberry | Light strawberry cake with pink coating | ★★★☆☆ |
“Cake pops are not just desserts, they’re edible works of art!” – Pastry Chef
The magic of Starbucks-inspired cake pops is in their simplicity and creativity. These small treats mix texture, flavor, and visual appeal perfectly. They continue to charm dessert lovers everywhere.
Essential Ingredients for Homemade Cake Pops
Making cake pops is fun, starting with the right ingredients. You’ll need a few key things to make a tasty cake pop recipe. It’s like baking something from your favorite bakery.
- Cake mix or baked cake
- Frosting
- Candy melts or chocolate coating
- Lollipop sticks
- Sprinkles or decorative toppings
Now, let’s look at each important ingredient for your cake pop journey:
| Ingredient | Purpose | Recommended Quantity |
|---|---|---|
| Cake Base | Provides structure and flavor | 1 prepared 9×13 cake |
| Frosting | Binds cake crumbs together | 1/2 to 3/4 cup |
| Coating | Creates smooth outer layer | 12 oz candy melts |
“The secret to perfect cake pops is finding the right balance between cake and frosting.” – Professional Baker
When picking ingredients, think about flavors. Chocolate cake with vanilla frosting or vanilla cake with cream cheese frosting are great choices.
Pro tip: Use room temperature ingredients for smooth mixing and the best texture. Fresh, quality ingredients make your cake pops amazing.
Required Tools and Equipment for Perfect Results
Making DIY cake pops at home is easy. You don’t need a fancy bakery setup. With the right tools and a little creativity, you can make cake pops that look like they came from a coffee shop.
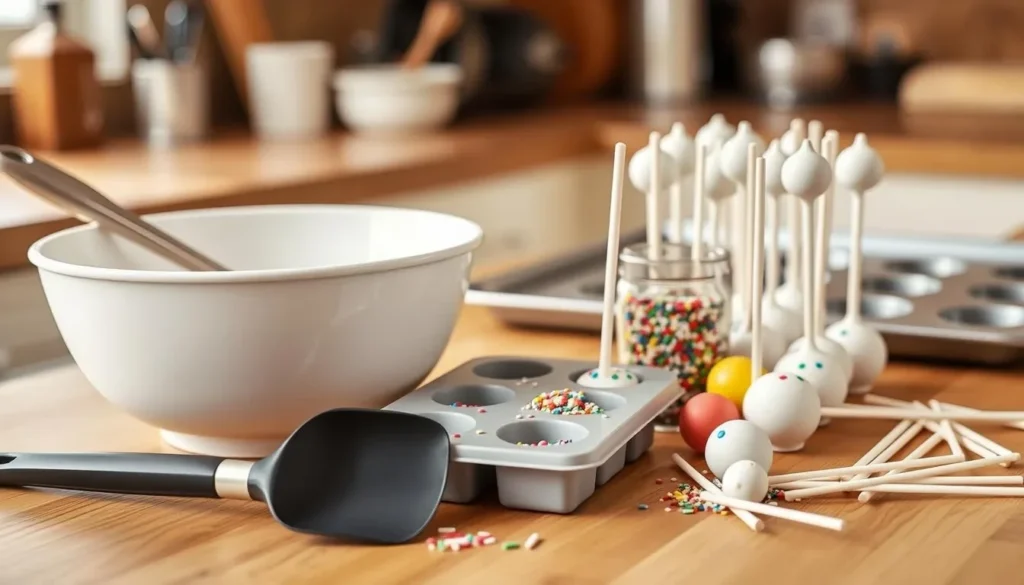
Start your cake pop journey by getting the essential tools. Good baking is all about being prepared and having the right tools ready.
Basic Kitchen Tools
- Mixing bowls in various sizes
- Electric mixer or whisk
- Rubber spatula
- Baking sheet
- Parchment paper
- Cooling rack
Optional Specialized Equipment
| Equipment | Purpose | Difficulty Level |
|---|---|---|
| Cake Pop Maker | Creates uniform cake balls | Easy |
| Cake Pop Stand | Helps with drying and decorating | Intermediate |
| Digital Kitchen Scale | Ensures precise measurements | Advanced |
Decorating Tools
Turn your cake pops into pro-looking treats with these decorating tools:
- Lollipop sticks
- Melting chocolate or candy melts
- Piping bags
- Decorative sprinkles
- Food coloring
“The right tools can turn simple ingredients into edible art!” – Pastry Chef Emma Roberts
While special tools can help, you can still make great cake pops without a mold. Just use basic kitchen tools and be patient.
Selecting the Perfect Cake Base
Choosing the right cake base is key to making delicious cake pops. Your recipe, whether vanilla or chocolate, needs a cake that holds well.
Different cakes offer unique qualities for your pops:
- Vanilla cake: Light and classic, perfect for most decorating styles
- Chocolate cake: Rich and decadent, ideal for chocolate lovers
- Red velvet: Adds a vibrant color and subtle flavor
- Funfetti: Brings playful texture and colorful appeal
When picking your cake base, think about these important factors:
| Cake Type | Moisture Level | Binding Ability |
|---|---|---|
| Homemade Cake | High | Excellent |
| Box Cake Mix | Medium | Good |
| Store-bought Cake | Low | Fair |
Pro tip: For moist cake pops, bake your cake a bit less. This keeps it moist for the perfect mix.
“The secret to amazing cake pops is starting with a cake base that’s moist and flavorful.” – Professional Baker
Remember, fresher cakes are better. Stale or dry cakes can ruin your pops’ texture and taste.
Starbucks Cake Pops Recipe: Step-by-Step Guide
Making homemade cake pops like Starbucks takes time and care. This guide will show you how to make tasty cake pops at home. You’ll turn a simple dessert into a treat that looks like it came from a bakery.
Starting to make Starbucks cake pops at home might seem hard. But with the right steps, you’ll soon be making yummy treats. Let’s go through the steps one by one.
Cake Preparation
First, bake your cake base. You can use:
- Vanilla cake mix
- Chocolate cake mix
- Red velvet cake mix
Bake the cake as the package says, making sure it’s cool before you start. Pro tip: Slightly underbaked cakes are best for cake pops.
Forming the Mixture
Turn your cake into a crumbly mix by following these steps:
- Crumble the cooled cake into fine crumbs
- Add frosting little by little
- Mix until it’s just right for molding
The secret to great Starbucks cake pops is getting the texture just right. It should be moist but not too wet.
Shaping and Chilling
Shaping needs a gentle touch. Here’s what to do:
| Step | Description | Tip |
|---|---|---|
| Rolling | Create uniform balls | Use a cookie scoop for consistency |
| Inserting Sticks | Dip stick in melted chocolate | Helps stick stay in place |
| Chilling | Refrigerate for 15-20 minutes | Ensures firm structure |
“Patience is the secret ingredient in creating perfect homemade cake pops.” – Pastry Chef Recommendation
Getting good at making Starbucks cake pops takes time. Each batch will help you get better, making your treats even more delicious.
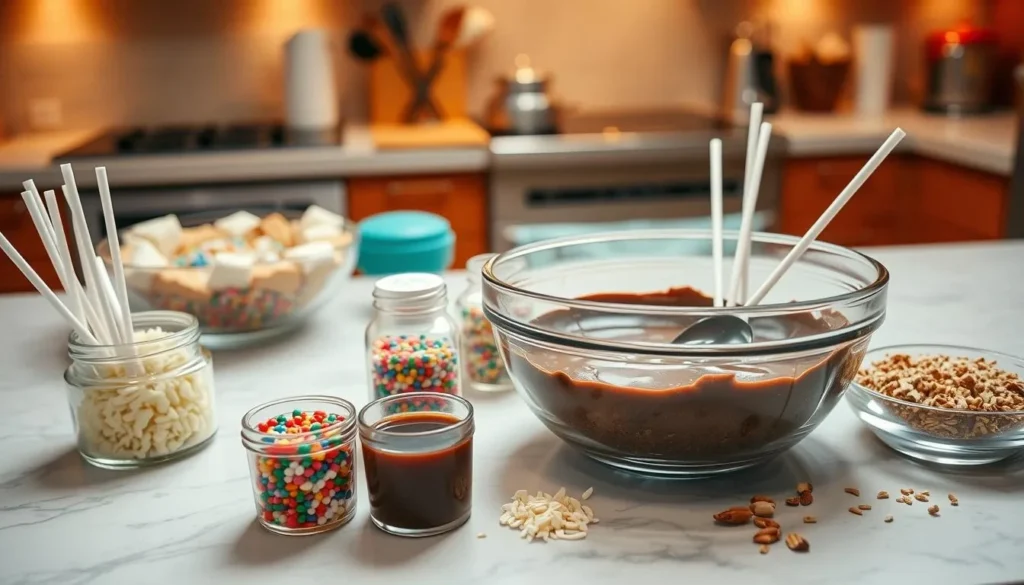
Mastering the Coating Process
Starting with cake pops for beginners means mastering the coating. The right coating can turn your treats into professional-looking desserts. Getting a smooth, glossy finish takes patience and practice.
Chocolate coating is the top choice for cake pops. Use high-quality candy melts or chocolate that melts well. Here are some tips for a flawless coating:
- Choose high-quality chocolate or candy melts
- Melt chocolate at low temperatures to prevent seizing
- Use a deep, narrow container for easy dipping
- Tap off excess coating gently
“The secret to beautiful cake pops is in the coating technique” – Professional Baker
Temperature control is key when coating cake pops. Chocolate should be between 100-110°F for the best consistency. If it’s too hot, it will crack. If it’s too cool, it won’t be smooth.
Some pro techniques include:
- Using a special dipping tool for even coverage
- Rotating the cake pop while removing excess coating
- Letting excess drip off before placing on a cooling rack
Practice is key to making perfect cake pops. Don’t worry if your first tries aren’t perfect. Every cake pop is a chance to learn!
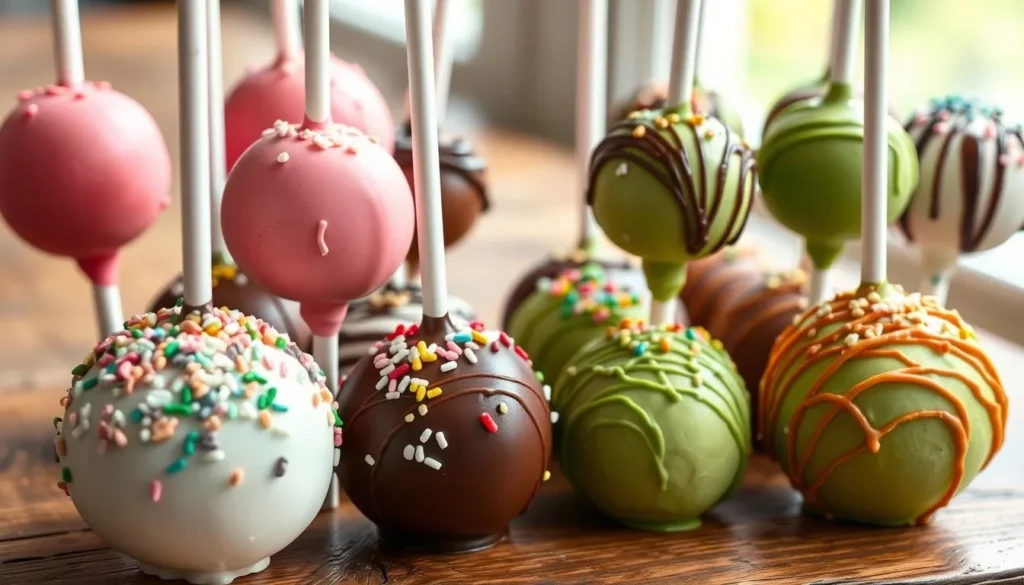
Professional Decorating Techniques
Turning your DIY cake pops into stunning works of art takes some skill. An easy recipe is just the start. The real magic happens when you decorate them.
Color Selection Strategies
Choosing the right colors can make your cake pops stand out. Here are some tips from the pros:
- Select colors that complement each other
- Use gel food coloring for vibrant, consistent shades
- Create color gradients for sophisticated designs
Pattern Creation Techniques
Professional decorators have many ways to make cake pops pop:
- Drizzle technique using contrasting chocolate colors
- Marbling effect with swirled colors
- Splatter paint style for a modern look
Special Effects and Advanced Decorating
Take your cake pops to the next level with these advanced techniques:
- Use edible glitter for sparkle
- Create texture with sprinkles or crushed nuts
- Experiment with metallic food paint
“The difference between good and great cake pops is in the details of decoration.” – Professional Baker
Remember, practice makes perfect when decorating cake pops at home. Start simple and get better with each try. Each cake pop is a tiny canvas for your creativity.
Common Mistakes to Avoid
Making perfect cake pops can be tricky for beginners. Many bakers face challenges that can make their treats frustrating. To succeed, you need to master a few key techniques and avoid common mistakes.
Here are the most common mistakes that can ruin your cake pop success:
- Incorrect Cake-to-Frosting Ratio: Too much or too little frosting can mess up your cake pop’s texture. You want it to hold together well without being too wet or dry.
- Improper Chilling: Cake balls need to be chilled well before dipping. If you skip this, they might fall apart.
- Chocolate Coating Temperature: Melting chocolate too hot can cause it to crack and not cover evenly.
“The difference between a good cake pop and a great one is often in the details.” – Professional Baker
When making cake pops, controlling the temperature is key. Your cake mix should be firm but not too dense. Mix and shape the cake balls gently.
For beginners, remember to be patient. Rushing can lead to bad results. Take your time with every step, from mixing to coating and decorating.
- Always use room temperature ingredients
- Chill cake balls for at least 2 hours before dipping
- Use candy melts designed for coating
- Tap off excess coating gently to prevent dripping
Avoiding these mistakes will help you make professional-looking cake pops. They’ll surely impress everyone.
Storage and Shelf Life Tips
Making delicious Starbucks-inspired cake pops at home is an art. Knowing how to store them right is key to keeping their taste and texture. Proper storage helps your cake pops stay fresh and tasty for a longer time.
Your cake pops need special storage to keep them fresh. Each method has its own tips to keep your treats perfect.
Room Temperature Storage
For short-term storage, room temperature is great. Here’s what to do:
- Store in an airtight container
- Keep away from direct sunlight
- Maintain room temperature between 68-72°F
- Consume within 2-3 days
Refrigeration Guidelines
Refrigeration is good for longer storage:
| Storage Method | Duration | Recommended Packaging |
|---|---|---|
| Wrapped individually | 5-7 days | Plastic wrap or wax paper |
| In sealed container | Up to 1 week | Airtight plastic container |
Freezing Methods
Freezing is the best for long-term storage:
- Wrap each cake pop individually in plastic wrap
- Place in freezer-safe container
- Store up to 6 weeks
- Thaw at room temperature for best results
“Proper storage is the secret to enjoying homemade cake pops at their absolute best!” – Baking Experts
Pro tip: Always let cake pops come to room temperature before serving. This helps restore their original texture and flavor.
Flavor Variations and Creative Twists
Want to make your vanilla or chocolate cake pops stand out? Try new flavor mixes that will wow your taste buds. By adding unique ingredients, you can turn simple desserts into amazing treats.
- Salted Caramel Chocolate Cake Pops
- Lavender Vanilla Cake Pops
- Maple Bacon Vanilla Cake Pops
- Matcha Green Tea Chocolate Cake Pops
- Coconut Rum Cake Pops
Want to create new flavors? Follow these tips:
- Begin with a basic vanilla cake pops recipe
- Try new spice mixes
- Add special extracts and liqueurs
- Find flavors that go well together
“Creativity is the secret ingredient in transforming ordinary cake pops into extraordinary culinary experiences.” – Pastry Chef Emily Roberts
| Flavor Category | Recommended Base | Suggested Coating |
|---|---|---|
| Fruity Fusion | Vanilla Cake | White Chocolate with Raspberry Drizzle |
| Nutty Delight | Chocolate Cake | Dark Chocolate with Crushed Almonds |
| Seasonal Special | Spice Cake | Cream Cheese Glaze with Cinnamon |
Creating great cake pops is all about mixing flavors right. Don’t be afraid to try new things. But make sure the taste is good and balanced.
Troubleshooting Your Cake Pops
Making perfect cake pops can be tough, even for experts. This guide will help you solve common problems. You’ll learn how to make your cake pops look professional.
Many challenges can happen when baking cake pops. Knowing these issues will help you make tasty and beautiful treats every time.
Cracking Prevention
Cracking is a big problem for new bakers. Here’s how to avoid it:
- Make sure the cake mix isn’t too dry
- Use just the right amount of frosting
- Chill the cake balls before dipping
- Keep the coating temperature steady
Texture Problems
Getting the right texture is key for perfect cake pops. Here are some tips:
| Texture Issue | Solution |
|---|---|
| Crumbly Mixture | Add more frosting slowly |
| Too Soft | Chill the mix before shaping |
| Dense Cake Pops | Use fresh cake and avoid overmixing |
Coating Issues
Getting a smooth coat can be hard for beginners. Here are some tips:
- Use candy melts at room temperature
- Tap off extra coating carefully
- Work fast to stop hardening
- Dip in a deep, narrow container
“Practice makes perfect when it comes to creating beautiful cake pops!” – Pastry Chef Recommendation
Mastering cake pops takes time and effort. Don’t give up, even if it takes a few tries. Each attempt will make you better.
Cost Comparison: Homemade vs. Store-Bought
Making your own cake pops can save you money compared to buying them. You might be surprised at how much you can save by baking at home.
- Starbucks cake pops cost $3.25 to $4.25 each
- Homemade cake pops can be as cheap as $0.50 to $1.00 each
- By making your own, you can save up to 70%
The main reasons homemade cake pops are cheaper include:
- Buying ingredients in bulk
- Using what you already have
- Being able to make as many as you want
“Making your own cake pops isn’t just about saving money—it’s about creating memories and enjoying a personalized baking experience.”
To see the cost difference, here’s a detailed comparison:
| Expense Category | Starbucks Cake Pops | Homemade Cake Pops |
|---|---|---|
| Base Cost per Pop | $3.25 – $4.25 | $0.50 – $1.00 |
| Ingredients Flexibility | Limited | Extensive |
| Customization Options | Standard Designs | Unlimited Creativity |
Your homemade cake pops save money and let you be creative. With a little time and effort, you can make delicious cake pops that are both affordable and unique.
Making Cake Pops in Advance for Events
When making DIY cake pops for special events, planning ahead is key. Your easy cake pop recipe can be made days before, making your event stress-free and fun.
Getting a head start is important. Here are some tips to save time on your homemade cake pops:
- Bake cake base 1-2 days before event
- Create cake pop mixture 24 hours in advance
- Shape and chill cake balls up to 48 hours early
- Coat and decorate 1 day before serving
Keeping your cake pops fresh is crucial. Here’s how to store them:
| Storage Method | Duration | Temperature |
|---|---|---|
| Uncoated Cake Balls | 3-4 days | Refrigerated |
| Fully Decorated Cake Pops | 2-3 days | Room Temperature |
Pro tip: Always store cake pops in airtight containers to preserve moisture and prevent potential contamination.
“Preparation is the key to perfect party treats!” – Professional Baker’s Secret
Mastering advanced preparation will make your DIY cake pops a hit. They’ll impress your guests and save you from last-minute stress.
Conclusion
Making your own Starbucks cake pops at home is a fun way to get creative in the kitchen. You’ve learned how to make these tasty treats just like the cafe. Now, you can try out new flavors and designs that show off your style.
With your new skills, you can wow your friends and family with amazing desserts. These treats are perfect for any occasion, from birthdays to holidays. At first, it might seem hard, but with practice, you’ll get better and more confident.
Every cake pop you make is a special way to express your creativity. You can play with flavors and coatings to find your own unique style. The best part of baking is learning, trying new things, and sharing yummy treats with loved ones.
So, why not start making cake pops today? Get your ingredients ready and set up your space. Let your creativity shine as you make these delicious treats that will make everyone happy.
FAQ
How difficult are cake pops to make at home?
Cake pops might look hard at first, but they’re actually easy with some practice. You need patience and basic baking skills. A step-by-step guide can help you make them look like they came from a pro.
What type of cake works best for cake pops?
Moist cakes like vanilla or chocolate are best. Denser cakes, like pound cake, hold together well. Avoid light or crumbly cakes that might fall apart.
Can I make cake pops without a specialized cake pop mold?
Yes, you can! Use a regular cake, crumble it, mix with frosting, and roll into balls. Many bakers make cake pops without a mold by hand.
How long do homemade cake pops last?
Homemade cake pops last 3-7 days at room temperature in an airtight container. Refrigeration can extend freshness to two weeks. Freezing them for up to a month is also an option.
Are cake pops expensive to make at home?
Making cake pops at home is cheaper than buying them. Buying ingredients in bulk and making many at once saves money. This makes homemade cake pops a budget-friendly option.
What coating options work best for cake pops?
Candy melts and chocolate are top choices. Candy melts are colorful and easy to use. Chocolate offers a rich flavor. Both can be melted for a smooth finish.
Can I make cake pops ahead of time for an event?
Yes, cake pops are great for making ahead. You can prepare them 2-3 days before an event. Just add decorations just before serving to keep them looking fresh.
What are some common mistakes to avoid when making cake pops?
Avoid using too much or too little frosting. Chill the cake balls before dipping. Keep the right temperature to prevent mistakes.
Can I make cake pops with dietary restrictions?
Yes, you can make cake pops for different diets. Use gluten-free cake mix, dairy-free chocolate, or vegan ingredients. This way, you can enjoy great-tasting cake pops that fit your dietary needs.
How can I prevent cake pops from falling off the stick?
Dip the stick in melted chocolate before inserting it into the cake ball. Chill the balls well before dipping. A firm, chilled cake ball is less likely to fall off.